Diamond painting is an increasingly popular pastime that inspires creative people all over the world. However, even though you don’t need any previous knowledge for this DIY trend, painting with diamonds can still present one or two challenges for beginners. To help you get started on the diamond painting adventure, we have put together the best basic tips for beginners in this blog. Whether you are a complete beginner or just looking for some useful tips, you will find everything you need to know here.
The best tips for Diamond Painting beginners
Round or square diamonds?
Diamond Painting pictures can be bought as sets with round as well as with square diamonds. The round drills have the advantage for beginners that, in contrast to the square drils, they do not have to be glued 100 per cent exactly and it is therefore easier and quicker.

Beginner-friendly picture size
If you have never tried Diamond Painting before, you should start with a smaller motif size (up to approx. 30 x 40 cm). Alternatively, you can choose a Diamond Painting sticker kit that doesn’t require you to complete an entire painting. These kinds of craft sets are good for getting a first impression of the principle of Diamond Painting. A Diamond Painting Sticker Set contains everything you need to get started straight away and, at the latest after completing the first Diamond Painting Sticker, you will have gained an impression of whether you enjoy this activity or not.

The perfect workplace
For Diamond Painting, it is important to have a workplace with good light and where you can sit comfortably to protect your eyes and back. The chosen surface should be level and also offer enough space to place the canvas and all the necessary utensils. It is best to lay out all the materials on a flat surface and make sure that everything is within easy reach.
Getting the canvas flat
The canvas with the motif of your choice comes rolled to your home and must be unrolled and smoothed before you can start working. To do this, either unroll the canvas overnight with the motif facing downwards, place it on a flat surface and weigh it down with books or other objects. If you don’t want to wait and want to start immediately, you can simply roll your canvas in the opposite direction to prevent it from rolling back. This only works with canvases that are made with cast glue, like Carat Art canvases. Another way to smooth your canvas immediately is as follows: Peel off the transparent protective film from one corner to about the middle of the canvas and then spread the film (for example with a large ruler) back onto the canvas. Repeat this with the other three corners to reduce the tension on the canvas, which will make it lie smoothly again.
How and where to start the diamond painting
First look at your canvas and decide which colour you want to start with. If you are right-handed, it is best to start at the top left or bottom left, if you are left-handed, at one of the corners on the right. Each symbol in the picture stands for a certain colour. A legend in the margin shows you which colour is assigned to which symbol.

Using the Diamond Painting bowl correctly
First pour a small amount of drills of the required colour into the bowl. The grooves on the bottom of the bowl help to ensure that the diamonds are all flat on the bottom. To turn the diamonds the wrong way up, simply shake the bowl gently with light and quick left/right movements. This will cause the small drills to lay in the correct position so that the faceted side is facing upwards and they can be picked up comfortably without the hassle of turning them over.
Wax and tool pen
To be able to work properly with the tool pen, the cavity of the pen tip must first be filled with wax. To do this, first remove the protective film from the wax. Then press the tip of the tool pen into the wax. Then stick the protective foil back onto the wax.
From time to time, the pencil must be poked into the wax again so that the little diamonds stick well to it again.
The correct way to handle the protective film
Do not pull off the top transparent cover film of the canvas completely at once, otherwise the adhesive layer on the canvas can dry out or dust, crumbs and hair can get stuck on it. Only uncover a small area at a time that you are working on and that you want to cover with diamond stones. As soon as you take a break or want to finish your work temporarily, the protective film should always be placed over the entire canvas again.

Don’t panic if you have placed one or more diamonds incorrectly
From time to time, it can happen that one or more diamonds are positioned incorrectly. Fortunately, these can be removed very easily with a pair of pointed Diamond Painting tweezers and then glued directly into the correct position.
Separate glued diamonds from each other
From time to time it can happen that the stones have stuck together during production. To quickly and easily separate drills that have stuck together, simply place them in a small bowl, place a second bowl of the same shape on top and carefully press the two bowls against each other or gently push the upper bowl back and forth. Afterwards, the now separated diamonds can be processed normally.
The right light
To help you distinguish between the symbols on the canvas and the colours of the diamonds, you should provide good lighting. One possibility is a bright table lamp, but even better is a light source underneath the canvas, which helps you to see the symbols even more clearly. A so-called Diamond Painting Light Pad makes it easier for you to work with the small drils and is easier on your eyes. Alternatively, you can also use a normal tablet.

Simply straight lines
With a ruler you can not only draw straight lines – you can also use it as an aid for straight drill lines in Diamond Painting. To make the first row at the edge of your motif neat and straight, you can place a ruler on the outer edge of the motif before setting the diamonds and then press the diamonds briefly towards the ruler as you set them. When the first row is finished, carefully remove the ruler. You can do the same on the opposite edge and on the sides. You can also use a Diamond Painting corrector with which you can easily push the drils into neat and straight rows after setting.
Use the properties of the glue
The Diamond Painting pictures in our shop are all made with cast glue, as this form of glue is of higher quality and has a longer lasting effect. One of the advantages of canvases with cast glue is that diamonds that have already been placed can easily be moved later with a pen or tweezers if something has slipped or the drills have not been placed quite straight. This advantage can be used to straighten diamonds that have already been placed or to move a wrongly placed diamond to the right place.

Just be faster
Use a multiple setter to speed up the application of the diamonds to the canvas. With these special attachments, which are usually simply attached to each pen tip, several diamonds can be picked up and placed at the same time. Depending on the size of the attachment, different quantities of drils can be picked up. Using a multiple diamond setter is not as difficult as you might think. It is best to start with a smaller 3 or 4 attachment to get used to using this tool.
Especially when working on large paintings, there are always larger areas that are only covered with small drills in a single colour. These areas on the canvases are also called “colour blocking” and for this it is worthwhile to work with multiple attachments for several small drills, as this makes the work considerably faster.
Order is everything
Order and organisation are essential to avoid mistakes in Diamond Painting and to be able to work with pleasure. Therefore, it is best to sort the diamonds by colour in a sorting box or a sorting box. This way you can keep track of all available colours. Storage boxes with many small compartments or individual jars are best suited for this purpose. The individual compartments or boxes can be labelled with the colour numbers of the drills so that nothing gets mixed up.

Storage for in between
If you don’t have a special workplace for your Diamond Painting hobby and therefore work at the dining or living room table, the canvas will inevitably have to be put away again and again. This is often not so easy, especially with larger paintings, as they should ideally always lie flat so that you can continue working immediately. Therefore, it is best to have a larger surface for temporary storage. If you don’t have a suitable surface, you can use a trouser hanger with clips and hang your picture vertically to save space. This way, the canvas is not in the way, can be moved aside at any time and still remains nice and smooth.
Working with baking paper
If you don’t like the transparent protective film on your Diamond Painting, or if it has been damaged or lost for some reason, you can use coated baking paper to cover your Diamond Painting instead. You can also cut off smaller pieces of baking paper and place them on different parts of the painting to protect them and prevent them from being touched by your hand while you are working. It is important to note, however, that it must be coated baking paper, as this can only be removed from the adhesive surface of the diamond painting without leaving any residue due to the coating.
Static Diamond Painting Diamonds
The diamonds can become statically charged by the movement in the bags. This sometimes makes it difficult to fill them into the bowls and to pick them up with the pen. There is a simple trick to prevent this. Cut small pieces of a dryer sheet, place one in each pouch and then shake the pouch gently. This creates an anti-static effect and the diamonds no longer stick to each other, but only to the designated spot on the canvas.
Finish the diamond picture
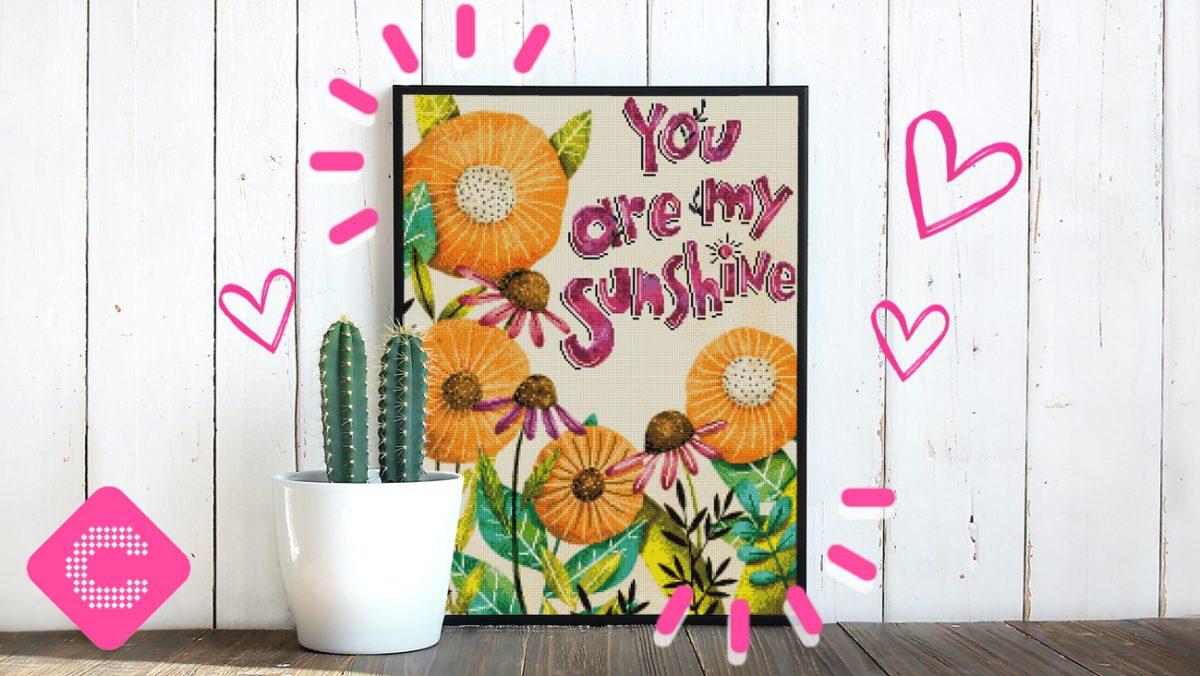
When your picture is finished, you should also press the drills down once more to fix any loose diamonds. To do this, place the transparent protective film or, if this is no longer available or has been cut, a piece of baking paper on the picture again and then roll over it with a rolling pin. If you don’t have a rolling pin or don’t want to use it for this purpose, you can also get a special Diamond Painting Roller. After this procedure, your diamonds are firmly attached to the canvas and your diamond painting is finished. Now you can frame it and decorate your home with it!

